
Yoga Side-bending Poses for Beginners

In everyday life, the sides of the body sometimes get neglected. Sitting, driving, reading, computer work, and even eating only require forward-facing movement. But many daily activities also require you to bend sideways, including cleaning, gardening, and chasing after young kids! And if you play sports — particularly ones that involve jumping or reaching upward, like basketball, volleyball, or tennis — you already know how important it is to stretch the sides of your body.
Benefits of Side Bending in Yoga
Side bends bring balance to your entire body. They lengthen the abdominal muscles, hips, and thigh muscles, while improving flexibility in the spine.
Side bends also stretch the muscles between the ribs (the intercostal muscles). These muscles can get short and tight in daily life, due to time spent sitting and slouching. Tight intercostals can weaken your posture, resulting in neck and shoulder tension. They also prevent a full range of motion in the ribs, which can restrict your breathing. Stretching out the intercostals will open up the ribcage and lungs, which will improve your breathing capacity. It will also relieve respiratory conditions, such as asthma, allergies, and colds.
Additionally, side bends stretch the abdominal muscles and digestive organs. This aids and regulates digestion, elimination, and metabolism. Women who are pregnant can also benefit from gentle side stretches, which will help to create more space in the torso for the organs and the growing baby.
Caution
Because of the asymmetrical balancing nature of side bends, do not practice these poses if you are currently experiencing very low blood pressure, dizziness, headaches, or diarrhea. Be sure to check with your doctor before practicing yoga if you have any injuries, health issues, or concerns.
The Sequence
Practice this sequence 2-3 times a week; it should take about 15 minutes to complete all of the poses. Take it slowly. Never force your body into any position. If you feel any sharp, pinching, or jarring pain, come out of the pose immediately and rest. Always keep in mind these general guidelines for practicing yoga:
- Move slowly in and out of the poses.
- Keep your breath smooth and even throughout the practice.
- Practice with an empty stomach.
- Never strain or force yourself beyond your current abilities.
Keep the exact order of this sequence, as it has been organized to bring you the most benefits. Do not change the arrangement of the poses.
Yoga breathing techniques, called "pranayama" in Sanskrit, can keep your muscles warm and your mind calm. This can help you stretch even deeper. If your breathing gets shallow, your muscles will stiffen, which can lead to injury. Breathe fully and completely when you're in the pose. You might notice that the deeper your breath is, the deeper your stretch will be!

This side-bending variation on Upward Salute — Urdhva Hastasana (OORD-vah hahs-TAHS-uh-nuh) — stretches the sides of the body, spine, shoulders, armpits, and belly. It tones the thighs, improves digestion, and helps to relieve anxiety and fatigue. It also creates space in the chest and lungs, which is therapeutic for asthma and congestion.
- Begin in Mountain Pose (Tadasana), standing with your feet together and your arms at your sides. If you have trouble balancing, stand with your feet six inches apart (or wider).
- On an inhalation, sweep your arms out to the side and then up overhead. Turn your arms so your palms face each other. Straighten your arms completely, but do not lock your elbows. Interlace your fingers and point your index fingers to the ceiling.
- Exhale as you press your left hip to the side and bend your upper torso to the right. Keep your feet grounded and your thighs firm and engaged. Lift up and out through your whole spine and arms.
- Hold for five breaths, then inhale and come back to center. Then bend to the left, and then come back to center. Exhaling, sweep your arms back down to the sides of the body.
2. Gate Pose
Gate Pose — Parighasana (pahr-eee-GAHS-uh-nuh) — stretches the side of the torso from the hips to the armpits, including the abdominal muscles, spine, and hamstrings. It opens the shoulders and reduces neck tension.
- Begin by kneeling on the floor with your hips and buttocks lifted up off your legs. Place a folded blanket beneath your knees, shins, and feet if you need extra padding. Your inner knees should be together and your thighs should be perpendicular to the floor.
- Extend your right leg out to the side and point your toes to the right, keeping your kneecap up. Keep your leg in line with your body, not behind or in front of you. Try to press the sole of your extended foot all the way onto the floor while keeping your leg straight. Turn your pelvis slightly to the right while keeping your upper torso facing forward.
- Extend your arms out to the sides at shoulder-height with your palms facing down.
- Exhaling, bend your torso to the right. Rest your right hand along your right thigh, shin, or ankle. Turn your left palm upward, then extend your left arm up toward the ceiling. Then reach your arm overhead and to the right, so your bicep rests against your left ear. Gaze upward to the ceiling.
- Hold for up to one minute. To release, inhale as you lift through your left arm to draw your torso upright, keeping both arms extended. Lower your arms, then step your right knee next to your left. Repeat the pose for the same amount of time on the opposite side.
.jpg)
A standard pose in many yoga styles, Extended Triangle — Utthita Trikonasana (oo-TEE-tah tree-koh-NAH-suh-nuh) — stretches the torso, hips, groins, and hamstrings. It also tones the legs, opens the chest and shoulders. It also helps to relieve lower back pain, stress, and sluggish digestion.
- Begin in Mountain Pose. Turn to the left and step your feet wide. Extend your arms out to the sides at shoulder-height. Your feet should be as far apart as your wrists. Rotate your right (front) foot 90 degrees so your front foot's toes point to the top of the mat. Turn your left toes in slightly. Align your heels.
- Reach through your right hand in the same direction that your right foot is pointed. Shift your left hip back, and then fold sideways at the hip. Rest your right hand on the outer shin or ankle of your extended leg. If you are more flexible, place your fingertips on the floor. You can also place your hand on a block.
- Align your shoulders so your left shoulder is directly above your right shoulder. Gently turn your head to gaze at your left thumb.
- Hold for up to one minute. To release, inhale and press firmly through your left heel as you lift your torso. Lower your arms, change the position of your feet, and repeat on the opposite side.

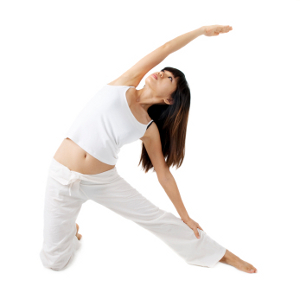
Reverse Warrior — Viparita Virabhadrasana (VIP-uh-REE-tuh veer-uh-buh-DRAHS-uh-nuh) — strengthens and stretches the legs, groins, and hips. It also stretches the hips and the sides of the torso and waist. Additionally, it improves flexibility in the spine, inner thighs, ankles, and chest. It also increases blood flow throughout the body, which reduces fatigue and helps calm the mind.
- Begin in Mountain Pose. Turn to the left and step your feet wide apart, about 4-5 feet. Align your heels.
- Turn your right foot out 90 degrees so your toes point to the top of the mat. Pivot your left foot slightly inward at a 45-degree angle.
- Raise your arms to the side to shoulder-height, parallel to the floor.
- Bend your front knee and align it directly over the ankle of your front foot. Sink your hips low.
- Exhaling, drop your left hand to the back of your left thigh. Inhaling, lift your right arm straight up and reach your fingertips toward the ceiling. Your right bicep should be next to your right ear.
- Lengthen through the sides of your waist. Slide your back hand further down your leg and come into a slight backbend.
- Gaze upward to your right hand's fingertips.
- Hold for 10-20 breaths. To release, inhale as you bring your torso upright and lower your arms. Exhale and straighten your front leg. Turn to the left, reversing the position of your feet, and repeat on the opposite side.
Bend & Extend
Regularly practicing side bends will revitalize and lengthen your whole body. With time, you'll even improve your breathing capacity, posture, and metabolism. Incorporate side bends into your everyday life to feel refreshed and rebalanced at any time!


